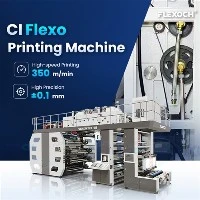
Hey there! As a supplier of flexographic presses, I often get asked about various maintenance tasks, and one that comes up quite a bit is how to replace the drive belts in these machines. Drive belts play a crucial role in the smooth operation of flexographic presses, so knowing how to replace them properly is super important. In this blog, I'll walk you through the process step by step.
Why Replace Drive Belts?
First off, let's talk about why you might need to replace the drive belts in your flexographic press. Over time, belts can wear out due to constant use, exposure to heat, and friction. When a belt starts to wear, it can lead to a whole bunch of problems. You might notice a decrease in print quality, as the press isn't running as smoothly as it should. There could also be strange noises coming from the machine, or the press might even stop working altogether. Replacing worn-out belts can prevent these issues and keep your press running at its best.

Tools You'll Need
Before you start replacing the drive belts, you'll need to gather a few tools. You'll need a set of wrenches, a screwdriver, a belt tension gauge, and of course, the new drive belts. Make sure you have the correct size and type of belts for your specific flexographic press. You can usually find this information in the machine's manual or by contacting the manufacturer.
Step 1: Power Down the Machine
Safety first! Before you do anything, make sure the flexographic press is powered down and unplugged. This will prevent any accidental starts while you're working on the belts. You should also lock out the power to the machine to ensure that no one can turn it on while you're in the middle of the replacement process.
Step 2: Locate the Drive Belts
The next step is to locate the drive belts in your flexographic press. The location can vary depending on the model of the press, but they're usually near the motor or the drive system. You might need to remove some covers or panels to access the belts. Use your screwdriver to carefully remove any screws or bolts holding the covers in place.
Step 3: Release the Belt Tension
Once you've located the belts, you'll need to release the tension on them. Most flexographic presses have a tensioning mechanism that you can use to do this. This could be a tensioning pulley or a bolt that you can loosen. Use your wrenches to adjust the tensioning mechanism until the belt is loose enough to remove.
Step 4: Remove the Old Belts
With the tension released, you can now remove the old belts. Simply slide the belts off the pulleys. Be careful not to damage the pulleys or any other components while you're doing this. You might want to take a picture of the belt routing before you remove the belts, especially if it's a complex setup. This will make it easier to install the new belts correctly.
Step 5: Inspect the Pulleys
Before you install the new belts, take a few minutes to inspect the pulleys. Look for any signs of wear, damage, or debris. If the pulleys are worn or damaged, they might need to be replaced as well. Clean the pulleys with a clean cloth to remove any dirt or grease.
Step 6: Install the New Belts
Now it's time to install the new belts. Refer to the picture you took earlier or the machine's manual to make sure you route the belts correctly. Start by placing the belts on the pulleys and then use the tensioning mechanism to apply tension to the belts. Use your belt tension gauge to ensure that the belts are properly tensioned. The correct tension will vary depending on the type of belt and the application, so make sure you follow the manufacturer's recommendations.
Step 7: Check the Belt Alignment
Once the belts are installed and tensioned, it's important to check the belt alignment. Misaligned belts can cause premature wear and reduce the efficiency of the press. You can use a straightedge to check the alignment of the pulleys. Make any necessary adjustments to ensure that the belts are running straight.
Step 8: Reassemble the Machine
After you've installed the new belts and checked the alignment, it's time to reassemble the machine. Replace any covers or panels that you removed earlier and tighten the screws or bolts. Make sure everything is securely in place.
Step 9: Power Up the Machine
Once you've reassembled the machine, you can power it up. Start the flexographic press and listen for any strange noises or vibrations. Check the print quality to make sure the press is running smoothly. If everything seems to be working okay, you're good to go!
Why Choose Our Flexographic Presses?
At our company, we offer a wide range of high-quality flexographic presses that are designed to meet the needs of various industries. Our presses are known for their reliability, efficiency, and ease of maintenance. Whether you're looking for a Woven Sack Flexo Printing Machine, a 4 Color Stack Flexo Printing Machine, or a Flexo Printing Machine For Paper Cup, we've got you covered.
If you're in the market for a new flexographic press or need help with maintenance and replacement parts, don't hesitate to reach out to us. Our team of experts is always here to assist you and answer any questions you might have. We're committed to providing the best products and services to our customers, and we look forward to working with you.


References
- Manufacturer's manuals for flexographic presses
- Industry publications on printing press maintenance