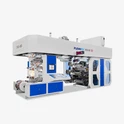
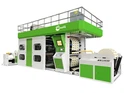
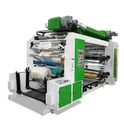
Hey there! As a supplier of 6 Colour Flexo Printing Machines, I'm super stoked to walk you through the installation process of these amazing machines. Whether you're a newbie in the printing biz or looking to upgrade your setup, this guide'll give you the lowdown on what to expect when getting your 6 Colour Flexo Printing Machine up and running.
Pre - installation Checks
Before we even start the actual installation, there are a bunch of things we need to check. First off, the location where you plan to install the machine is crucial. It should be a well - ventilated area because the printing process involves inks and solvents, and good ventilation helps keep the air fresh and safe for everyone. Also, make sure the floor can handle the weight of the machine. These 6 Colour Flexo Printing Machines are pretty hefty, so a sturdy floor is a must.
Next, we need to look at the power supply. You gotta have the right voltage and amperage available. Check your electrical system to ensure it can support the machine's power requirements. If not, you might need to consult an electrician to make some upgrades. We don't want a power outage in the middle of a big print job, right?
Another important thing is to check all the components of the machine. When it arrives at your place, carefully inspect the packaging for any signs of damage during transit. Open it up and make sure all the parts are there. Refer to the packing list that comes with the machine to double - check. If you find any missing or damaged parts, let us know right away, and we'll sort it out for you.
Unpacking and Assembly
Once all the pre - installation checks are done, it's time to unpack the machine. Be gentle while removing the packaging materials. You don't want to accidentally scratch or damage any of the components. Start by taking out the main frame of the machine and place it in the designated location.


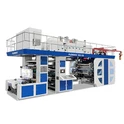
Now, let's talk about assembly. The 6 Colour Flexo Printing Machine comes with a detailed assembly manual. It's like a step - by - step recipe for putting the machine together. First, attach the printing units one by one. These units are where the magic happens – they're responsible for applying the different colors onto the printing material. Make sure they're properly aligned and tightened. You don't want any wobbly printing units that could mess up your prints.
After attaching the printing units, it's time to install the ink systems. The ink systems are what deliver the ink to the printing plates. Connect the ink tanks, pumps, and hoses according to the instructions. It's important to get the connections right to avoid any ink leaks. A little bit of ink leakage can make a huge mess and also affect the quality of your prints.
Alignment and Calibration
Once the machine is assembled, alignment and calibration are the next big steps. Alignment is all about making sure that all the printing units are in the right position relative to each other. If the units aren't aligned correctly, the colors on your prints won't line up properly, and you'll end up with a blurry or misaligned image.
We use special tools to check and adjust the alignment. It might take a bit of time and patience, but getting it right is crucial for high - quality prints. Calibration, on the other hand, is about setting the machine to print at the right speed, pressure, and ink density. You need to calibrate the machine for different types of printing materials, like paper, plastic, or Pp Woven Bag Printing Machine. Each material has its own characteristics, and the machine needs to be adjusted accordingly.
Testing and Commissioning
After alignment and calibration, it's time for some testing. We start with a test print. Use a sample printing material to run a few prints through the machine. Check the quality of the prints carefully. Look for things like color accuracy, sharpness, and whether the colors are evenly applied. If you notice any issues, like streaks or smudges, we need to go back and make some adjustments.
Once the test prints look good, we can move on to commissioning the machine. Commissioning means officially putting the machine into operation. We'll train your staff on how to use the machine properly, including how to load the printing materials, change the printing plates, and maintain the ink systems. We want to make sure that your team is confident and comfortable using the machine.
Maintenance and Support
After the installation is complete, maintenance is key to keeping your 6 Colour Flexo Printing Machine running smoothly. Regularly clean the machine to prevent ink buildup and other debris. Check the lubrication levels of the moving parts and replace any worn - out parts as needed.
We also offer ongoing support. If you run into any problems or have questions about the machine, our team of experts is just a call or an email away. We can provide troubleshooting advice, send replacement parts if necessary, and even offer on - site support if needed.
Other Options
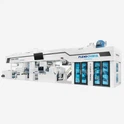
If you're thinking about expanding your printing capabilities in the future, we also offer other types of printing machines, like the 8 Colour Flexo Printing Machine. This machine allows you to print with even more colors, giving you more creative freedom. And if you're specifically interested in printing on plastic bags, our Plastic Bag Flexo Printing Machine is a great option.
Conclusion
So, there you have it – the installation process of a 6 Colour Flexo Printing Machine. It might seem like a lot of steps, but with our guidance and support, you'll have your machine up and running in no time. If you're interested in purchasing a 6 Colour Flexo Printing Machine or have any questions about the installation process, don't hesitate to reach out. We're here to help you take your printing business to the next level.
References
- Manufacturer's manual for 6 Colour Flexo Printing Machine
- Industry best practices for flexo printing machine installation